

CONNECT DATABASE IN VISUAL STUDIO IN C#.NET
Everyone who uses the Visual Studio needs to connect to a database at some time for their elaborate purposes. Database can be connected in 11 different methods with Visual Studio. Here i made a simple connectivity method by adding a .mdf file to you Windows Application form.
STEP 1:
On the File menu, point to New and then click Project.

STEP:2
In the New Project dialog box, click Windows Forms Application, and then click OK.
A new Windows Forms project opens.

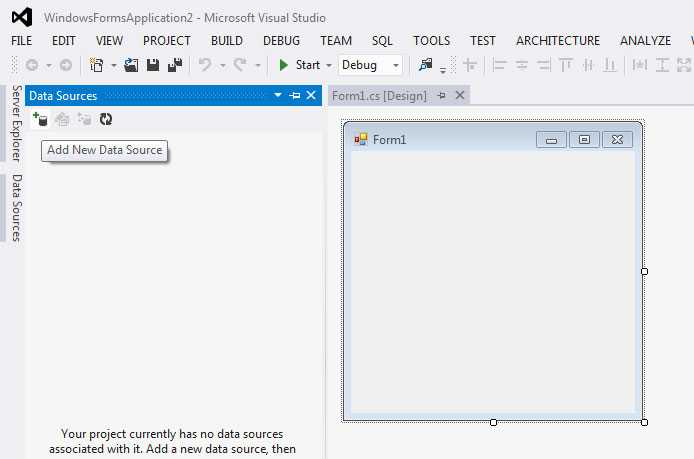
STEP:3
On the Data menu, click Add New Data Source.
The Data Source Configuration Wizard opens.
STEP:4
Click Database and then click Next.
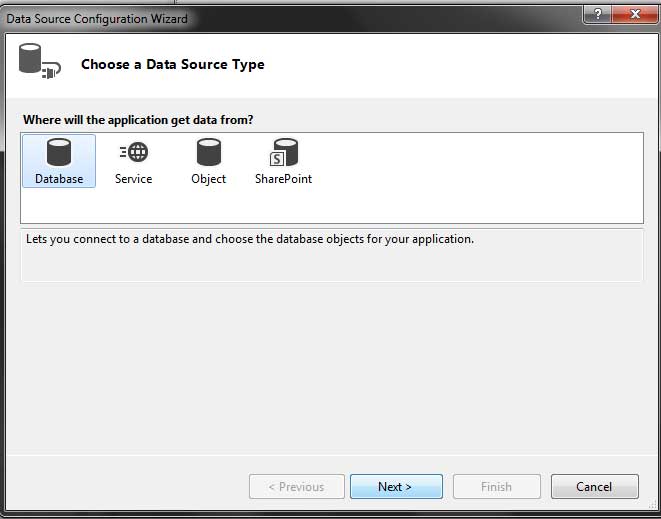
Select Dataset
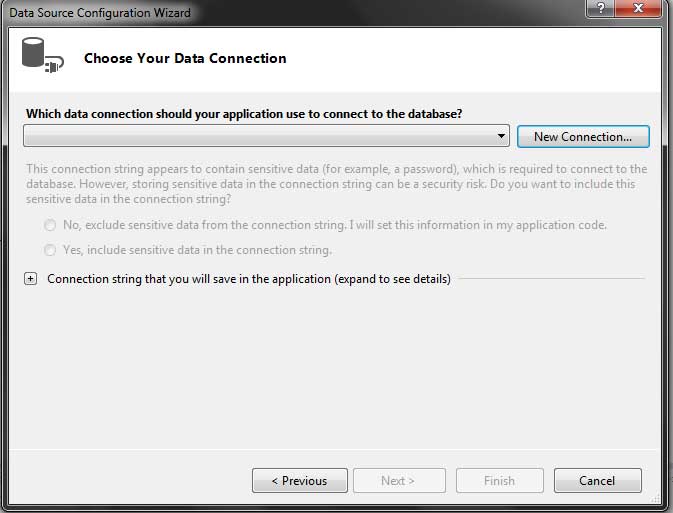
STEP:5
Click New Connection.
The Add Connection dialog box opens.
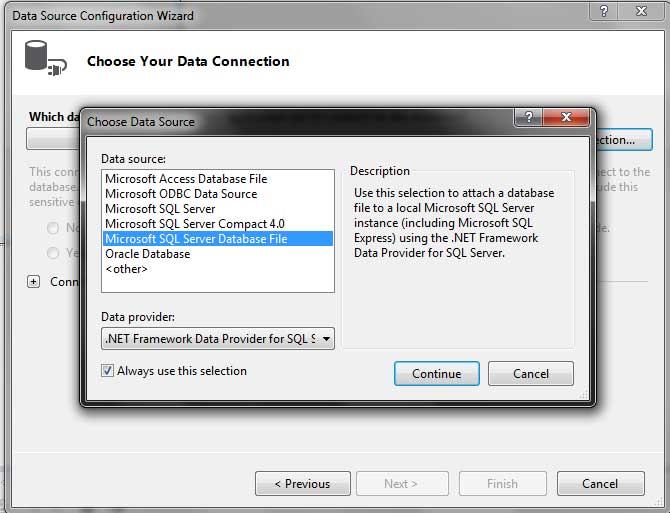
STEP:6
In the Add Connection dialog box, click Change and select Microsoft SQL Server Database file from the Change Data Source dialog box. Click Continue.
STEP:7
Browse for the database file with .mdf extension and click Test Connection
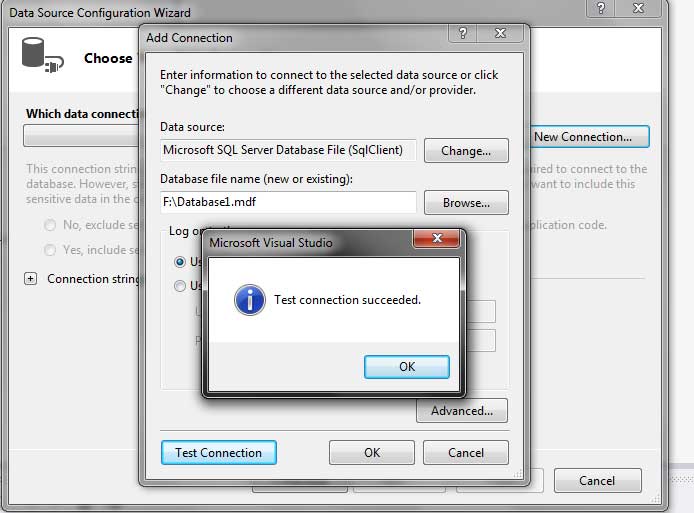
STEP:8
If the test connection is succeeded press ok and click next in the Data source configuration wizard and click Next in the next screen. Select the tables list from your database.

STEP:9
Now click Finish to connect with your database file.
And you can view tables on the Data Source menu .

STEP:10
After connecting database to your form you have to link it to your application by copy the connection string from the properties of the database.

STEP:11
Now paste it to your sql connection. And its done. You have successfully connected your database….

Nice Article very usefull link